Multiplexing 7segment display and Counter use Arduino.
In this tutorial we will learn how multiplexing Seven Segment display works and how to interfacing with Arduino. We have created a counter here using a multiplexing seven segment display that can count decimal numbers from zero to 9.
This multiplexing seven segment display is increasing the decimal value by 250 milliseconds.
You can watch the following video or read the written tutorial below.
Let see the closer look at the seven Segment display:
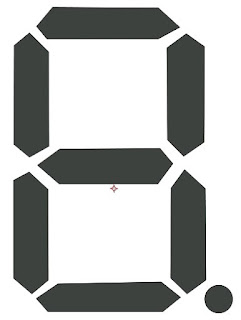
1 Digit Seven Segment display is contain 7 Segment and a Dot Point. It has 7 Bar-graph LEDs for 7 Segment. Each Bar-graph LEDs is denote a, b, c, d, e, f and g. These Bar-graph LEDs are activated by foreword current. Activates a certain number of Bar-graph LEDs and displays certain letters and digits.
Seven Segment displays are divided into two parts based on the connection of the Bar-graph LEDs. One is Common Cathode and other is Common Anode.
In this tutorial we have used Common Cathode Seven Segment display.
The circuit schematic is very quick sample. The Common Cathode Seven Segment display is connected to Arduino pins 2, 3, 4, 5, 6, 7 and 8. Here's we have used 100 ohm resistor witch limiting the Bar-graph LEDs forward current.
Up Counter Arduino Code:
Code Explain:
Here's the simple Up counter Arduino code. In define section we have defined a 2 dimensional array which activate and deactivate Segment by 7 for ten characters. We have defined display_write( ) function header. Next we have defined a integer variable which name is "count".
In setup, we have set Arduino pin mode. In this case pin 2, 3, 4, 5, 6, 7 and 8 of Arduino board is an output pins.
In the main loop, we have created a for loop which increase the count variable and call the display_write( ) function. The for loop will rotate for 500 millisecond( ms ) in a row.
Here, we have create a display_write( ) function. In this function we have set the pin variable value is 2. Next, we have created a for loop witch activate and deactivate the specific segment of seven Segment display. In additional to numbers, we can display different type of character on Seven Segment display.
Down Counter Arduino Code:


I like your blog! Someone I share your links at this Microcontroller components site. You're doing a great job!
ReplyDelete